Instructions
Carefully follow each step to achieve an optimal application of the product. DinaBase7 is made of thermoplastic material and must be heated before application to become fully malleable. After application and cooling, the denture will remain stable and comfortable, preventing annoying food residues and pressure sores, while still allowing you to remove and clean your denture daily as usual.
You can also download the instruction leaflet to keep it with you at all times.
If you have any questions or doubts, check the FAQ section, watch the video guide, or contact us. We will provide you with all the necessary information.
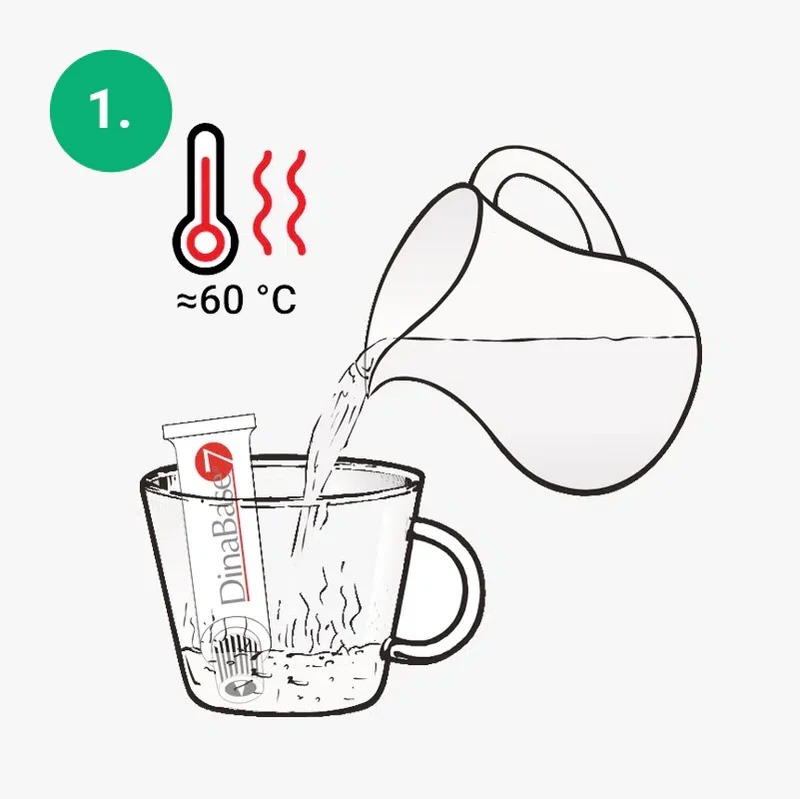
1. Heat the tube and clean the denture
Fully immerse the tube in hot (but not boiling) water for a few minutes, at a maximum temperature of 60°C.
While the tube is heating, remove any residue of previously applied adhesives from the denture.
Thoroughly clean the entire surface with water and soap, brush it, and dry it well.
The denture must be dry and perfectly clean to ensure proper adhesion.
Important: If the tube is already perforated, it must be heated with the cap on – screw it back on tightly and immerse it in hot water.
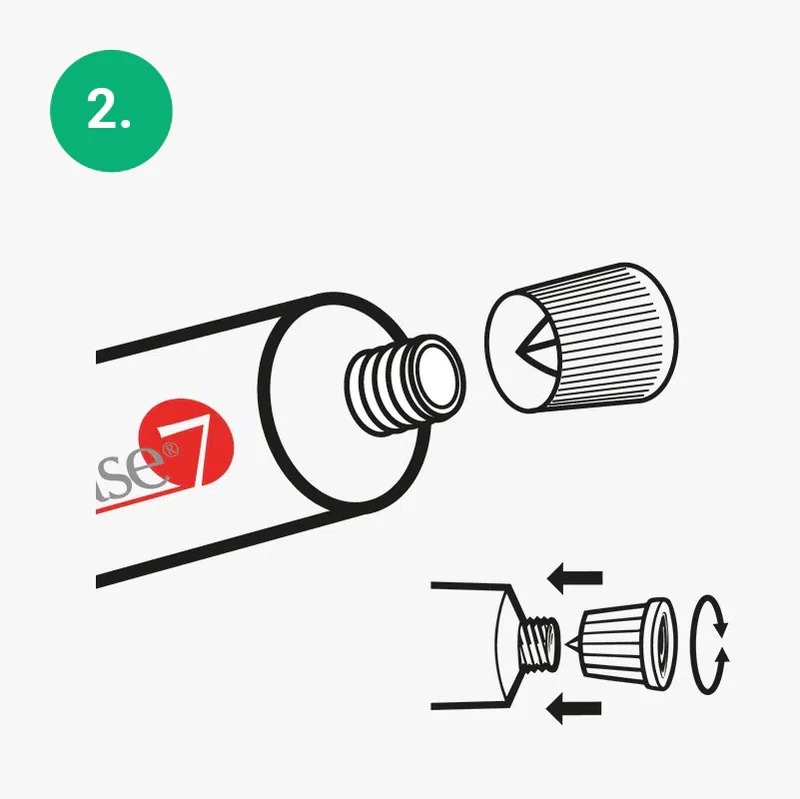
2. fully open the tube
It is necessary to create a large, round hole to fully open the passage, allowing the product to come out easily.
Important: If the product does not come out smoothly, first check that you have fully punctured the tube opening.
If the material is still too viscous (too “hard”), repeat step 1 by screwing the cap back on tightly and reheating the tube.
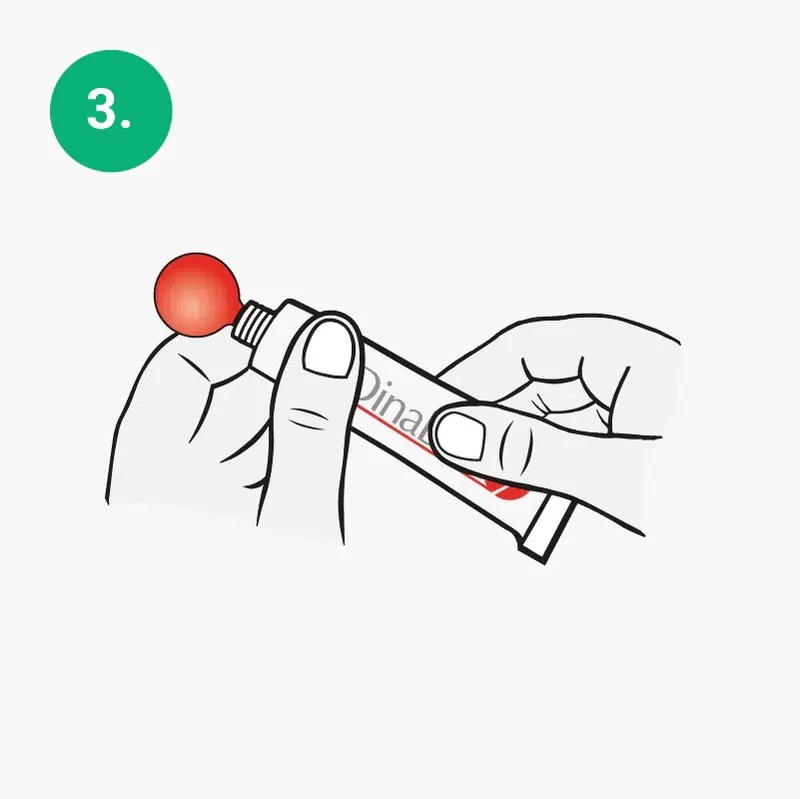
3. take a portion of the product
Press the tube near the fold and squeeze out a ball of adhesive about the size of a large cherry. Do not use too little; after the first few applications, you will better understand how much material to use and how to distribute it properly.
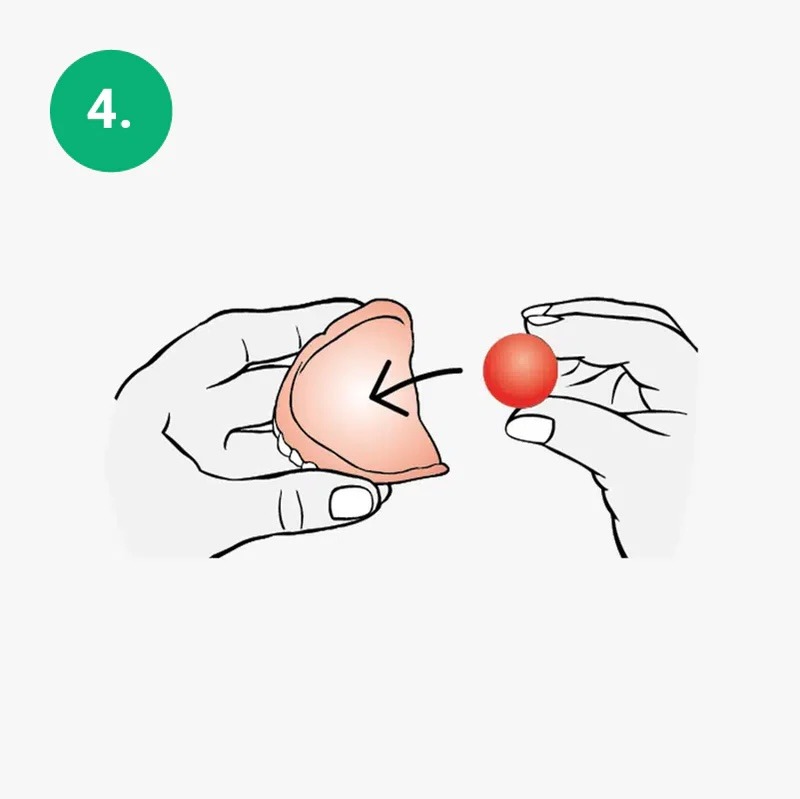
4. place the extracted portion in the center of the denture
For upper jaw dentures, the adhesive should cover the entire surface of the denture.
For lower jaw dentures, the amount should be enough to form a strip that completely fills the cavity (see step 9).
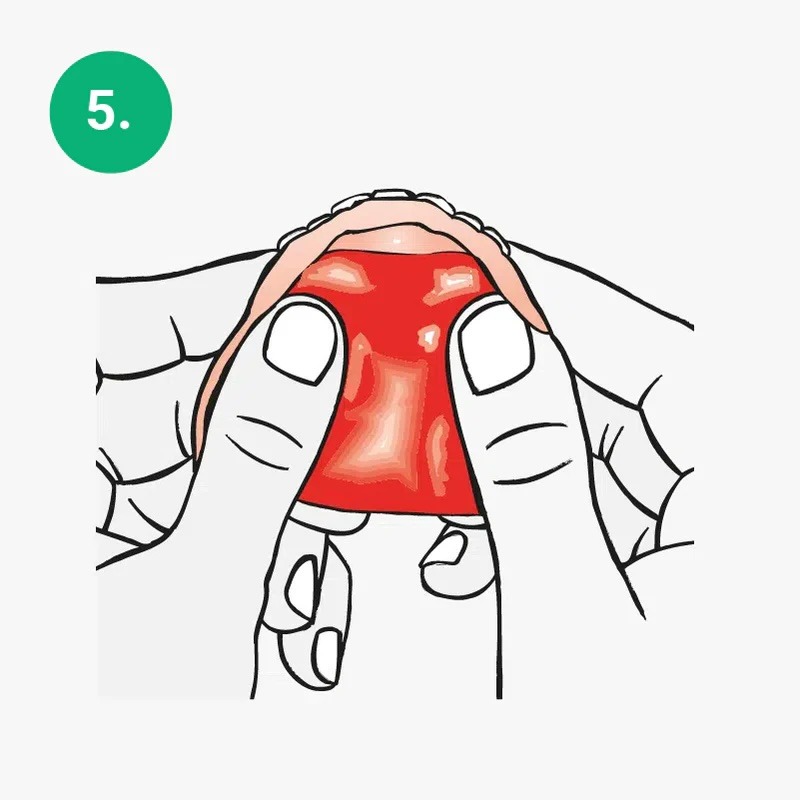
5. spread the material evenly
Using both thumbs, press and shape the material to create an even layer.
The adhesive must be spread across the entire surface of the denture.
To achieve a stronger “suction effect,” make sure to press the layer firmly along all the edges of the denture.
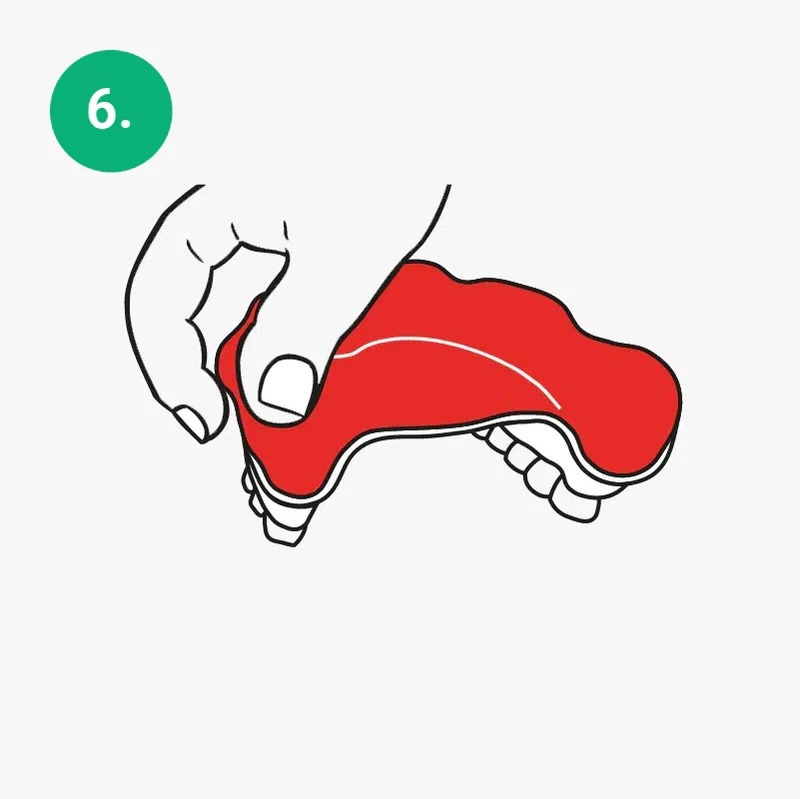
6. apply evenly along the edges
Make sure to apply the adhesive evenly across the entire surface of the denture and ensure it adheres well, especially along the edges.

7. mouth adaptation
Thoroughly moisten your mouth before inserting the denture.
Once in place, close your teeth and make accentuated movements with your lips – this will help the denture adjust properly, allowing any excess product to escape from the edges.
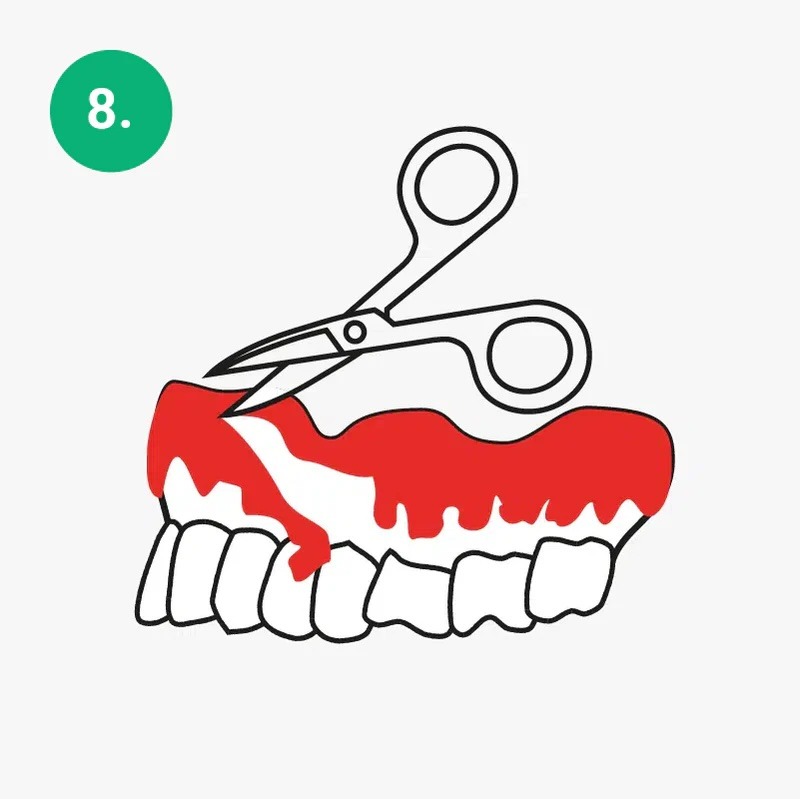
8. removing excess material
Rinse the denture under cold running water for a few minutes, then trim any excess material along the edges with small scissors.
Your denture is now ready for use.
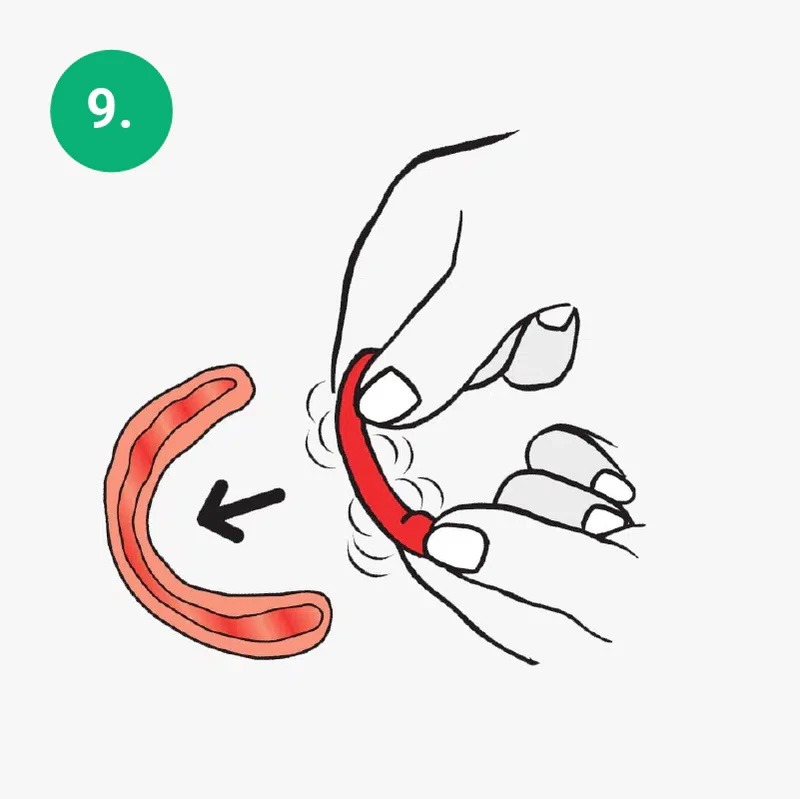
9. for the lower denture
For the lower denture, follow the steps described in points 1, 2, and 3.
Then, shape the adhesive ball into a strip and spread DinaBase7 with your fingers.
Press firmly, especially along the edges, for better adhesion.
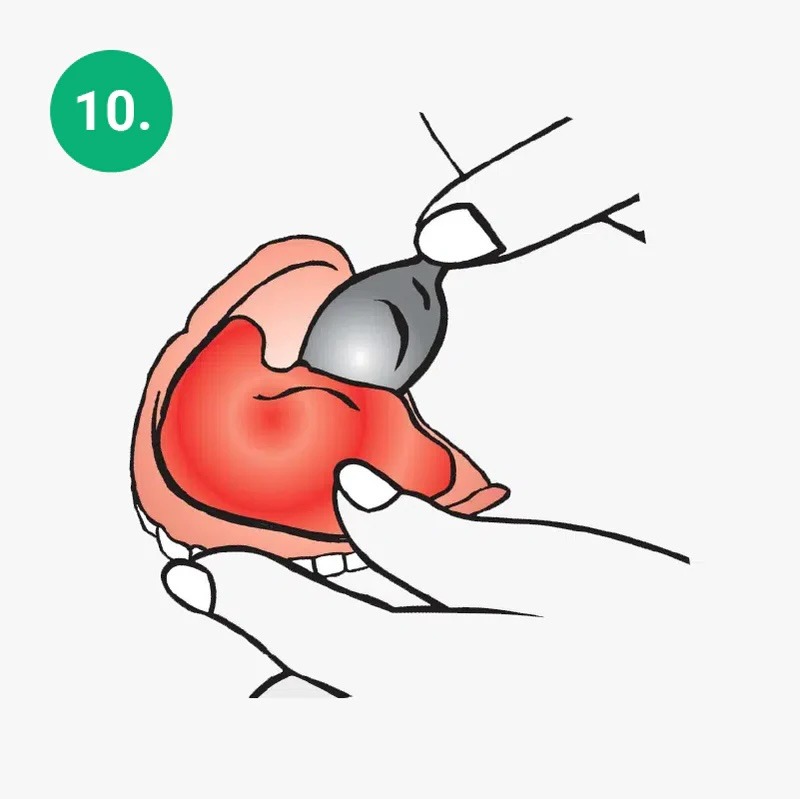
10. replace dinabase7
WARNING: Do not immerse the denture in boiling water, as this could cause irreversible damage!
If needed, use a blunt tool like a spoon to avoid scratching the denture.
Replace DinaBase7 within 7 days to ensure optimal hygiene, prevent bacterial or fungal growth, and avoid bad breath.

Recommendations and tips for better adhesion
» In the first few hours after application, avoid drinking alcohol and very hot beverages.
» If you realize that you have used too little material – such as feeling the hard resin of the denture rubbing against your gums or palate – you can easily add more on top. However, first, thoroughly clean and dry the entire surface of the existing layer, only then will the additional material adhere properly!
» Do not be alarmed if you feel a burning sensation when inserting the denture into your mouth – during the first application, there is a mild disinfecting effect. Remove the denture and rinse it under cold running water for a few minutes. Rinse your mouth again before reinserting the denture – the burning sensation will disappear.
» If you are switching from a traditional adhesive that does not create a protective cushion between the hard resin of the denture and your gums, you may experience sores. If your gums are inflamed or you have cuts in your mouth, these may cause a burning sensation when in contact with DinaBase.
We recommend treating these wounds as soon as possible. You can use a product like Cikaflogo, a natural solution specifically designed to heal gums, the tongue, and the mouth.
Improve your quality of life!
Ask your trusted pharmacist.

Still have doubts? Questions?
Download the leaflet or consult the video guide
INFORMATION LEAFLET – ITALIAN

INFORMATION LEAFLET – ENGLISH
Video Guide

CE-CERTIFIED MEDICAL DEVICE
PRODUCED BY:
Dr. Pasini Laboratorio Chimico S.n.c.
Via dell’Industria, 5
20875 Burago di Molgora – Monza e Brianza
P.IVA IT02340880968
DISTRIBUTED EXCLUSIVELY BY:
Qusttroti Dentech S.r.l.u.
Via Maestri del Lavoro, 120
21040 Cislago – Varese
P.IVA IT02541250136
ITALIAN PRODUCT – DESIGNED AND MANUFACTURED ENTIRELY IN ITALY
©2025 Quattroti Dentech S.r.l.u. – Dinabase7® is a Registered Trademark – CE Medical Device